




2
hours
lesson per week

Live
classes with a teacher

8-10
kids per group
7th Oct
starting
Your child will learn in the most advanced, interactive way
1
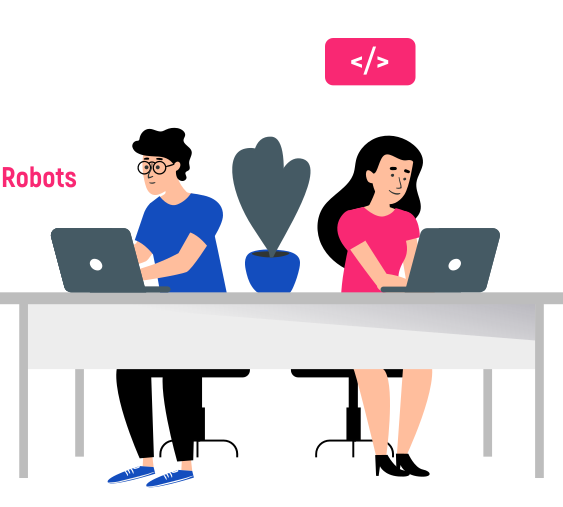
They will learn how different devices work.

2
They will learn how to build and control Robots.
3
They will learn creating computer games.

Why Parents Choose impact A&C
Our mission is to transform every child from a mere consumer into a creator of IT technologies. Instead of mindlessly using gadgets without benefit, your child will gain skills that can be applied in school, in their chosen profession, or to become a sought-after IT specialist.
Courses that will put your child at the forefront of technology
8 years of international experience across Europe, teaching 86 tech topics
Certified Specialists in delivering engaging & interactive learning sessions with kids
Trusted by parents and partners
IT-Master - level l course program
- 12 practical lessons
- 12 practical lessons
- 12 practical lessons
IT-Master - level ll course program
- 12 practical lessons
- 12 practical lessons
- 12 practical lessons
Module 1. Visual Programming.
Scratch - it is a visual programming tool that allows the creation of games and animation. In this course, children will develop creativity and logic.
After this module, children will know:
Soft Skills: public speaking, project presentation
After this module, children will know:
- The basics of programming (variables, loops, logical sequences)
- Creating customized games with Scratch
- Creating characters using Scratch
Soft Skills: public speaking, project presentation
Module Plan
Lesson 1
- Find out what is Visual Programming in Scratch.
- Define the terms algorithm, program, programmer, code.
- Create an account on Scratch.
- Create a name animation on Scratch.
Lesson 2
- The purpose of this assignment is to remind us how the 3 types of cycles work: repeat forever, repeat until, repeat 3 times.
- Create an animation where the bird character flies, flaps its wings and pushes itself off the edge, changes direction.
Lesson 3
- Develop a broader understanding of basic concepts in programming: iteration, testing, debugging, reuse and remixing.
- Explore the process of creating an animation-story by creating our own story.
Lesson 4
- Familiarization with conditions in programming (if-else blocks)
- Studying operators and variables.
- Learning the term: "if-else construction",
- Introduction to game development, creating first interactive scenario.
Lesson 5
- Create a game, based on the program created in the lesson, where the speed of the obstacles gradually increases every 20 seconds.
- Make the background change every 30 seconds of gameplay
Lesson 6
- Access your personal Scratch account.
- Create a game, where the character hides and appears in random places.
- The character plays a sound if the user catches it with a mouse click.
Lesson 7
- Repetition of previously studied terms: variable, if-else condition operators, cloning, working with x and y coordinates.
- Continue to develop games using variables, loops, conditional operators and math functions to complicate the game.
Lesson 8
- Work with the x and y coordinate system and using different means of character movement.
- Use variables in programming: score, timer, health, number of levels.
- Use mathematical functions.
Lesson 9
- Creating an educational game.
- Practice using variables.
- Using conditional operators and loops.
- Using the ask and wait and answer blocks.
Lesson 10
- Creating your own Paint application.
- Working with new terms: pen, duplicate, clear,
- set pen size, width, eraser.
- Working with pen components: pen down, pen up.
Lesson 11
- Repeating the cycle term.
- Introduction to the "repeat until..." block.
- Identify the differences in 3 types of cycles: "repeat always", "repeat... times", "repeat until...".
Lesson 12
Project Fair
Module 1. Construct 3
Do you want your child to not only play games, but also learn how to create games for Windows? In this intensive we will create team and individual games on the platform Construct 3 with our characters and interactions between them.
The children will learn about the game creation platform - Construct 3 and learn the basics of game programming. The kids will master the platform interface, create their own world in the game through simple design implementation and as a result create new heroes, games and project.
As a result of the training the kids:
The children will learn about the game creation platform - Construct 3 and learn the basics of game programming. The kids will master the platform interface, create their own world in the game through simple design implementation and as a result create new heroes, games and project.
As a result of the training the kids:
- learn to create 2D games
- Learn the programming bases
- develop logical thinking
- create your project and present it
- learn to use 2D graphics
Module Plan
Lesson 1. asics of Construct 3
- Understand what a video game is
- The most popular games
- Differences between 3D and 2D games Understand what a game engine is
- Creating a Construct 3 account
- Study the structure of a project in Construct 3
- Explanation of the Event Sheet concept Creating the first game in Construct 3
Lesson 2. Creating a Game Level
- Creating a new Layout
- Creating a new Event Sheet
- Defining the menu in a video game
- Creating a prototype of a platformer level
- Understanding behavior concepts
- Creating a menu
- Linking the menu with levels in the gamea
Lesson 3. Character Programming
- Skills in programming characters
- Understanding interrelated objects Detailed design
- Ability to edit text
Lesson 4. Peripheral Devices
- Knowledge of peripheral input devices Understanding the role of devices in game creation
- Working with the keyboard and mouse in Construct 3
- Module plan
Lesson 5. Object Behaviors
- Understanding physical reactions in video games
- Applying acquired knowledge in practice Understanding behavior patterns
- Experience in using animations
Lesson 6. Variables
- Definition of variables
- Creating variables in video games
- Programming interactions between variables and other game elements
- Mastering basic operations with variables Skills in graphical programming
Lesson 7. Object Programming
- Deepening the ability to work with physical reactions
- Improving skills in programming objects in video games
- Programming input devices
- Understanding the concept of randomness (Random)
Lesson 8. Endless Game
- Skills in creating and using variables Understanding the concept of the end screen The concept of an endless game
- Defining pauses in a video game
Lesson 9. Level Design
- Improving skills for creating game levels Better understanding of game design elements Working with game design editing tools
- Module plan
Lesson 10. Game Effects
- Ability to connect multiple levels
- Knowledge of programming objects at each level
- Working with effects
Lesson 12. Project fair
Lesson 11. Mathematical Operations in Programming
- Understanding arithmetic operations when working with variables
- Defining the concepts of local and global variables
- Preparation for project presentations
- Review of learned material
- Creating a project presentation
- Project presentations
Module 2 - Game Development with GDevelop
In this course we teach children the basics of developing computer games in GDevelop environment: from building the simplest scenes to programming scripts and control.
After completing the module, students will be able to:
After completing the module, students will be able to:
- Create scripts for moving objects, generating obstacles, calculating remaining health, enemy behavior, restart and game pauses, scoring points and changing the rules of the game in real time
- Set background, draw and animate your characters
- Draw in GDevelop Editor
- Create games with levels, menus and conditions for winning
- Soft skills: to speak in public, to present oneself and one’s projects
Module Plan
Lesson 1. GDevelop Basics, Introduction
- Introduce students to Gdevelop
- (https://gdevelop-app.com/)
- Learn the main features of Gdevelop Understand the difference between a browser game and a desktop game
Lesson 2. Flappy Bird
- Learn how to implement a multi-scene game Create a basis for a mobile game
- Design and build a game like Flappy Bird Create dynamic objects
Lesson 3. Shooter
- Start learning the Gdevelop physics engine
- Implement mouse control
- Implement shot physics
- Implement destruction physics
Lesson 4. Physics
- Explore the concept of “randomness” in games
- Create a randomly generated object Make the game endless
- Add a pause menu
- Module Plan
Lesson 5. Download App GDevelop
- Download Gdevelop
- Get started with the app, check out the new features
- Create a new project
- Make a design for the game
Lesson 6. Football Kick
- Learn how to load and save projects Learn how to program object behavior Master the tools for scoring
- Set the characteristics of our ball Master the use of variables
Lesson 7. Snake
- Learn to Create a snake game
- Make a game that generally consists of events
- Work in the sprite editor
- Create a group of objects
- Structure the code
Lesson 8. Route for the car
- Study the physics of driving in games Build a level - a track for racing Make a car using a physics engine
- Implement the process of driving,
- balancing, restarting the level
- Module Plan
Lesson 9. Piskel
- Learn the Piskel painting tool
- Create procedural animations
- Paint the main assets for the game
Lesson 10. Effects
- Create animation effects
- Working with effects
- Working with lighting
- Uploading games for specific devices
Lesson 12. Project Presentation
- Presentation of one project to the audience. Students explain how the project works, what is its purpose. They tell what blocks they used and how they work. They present a project that was made in GDevelop. This project should reflect the student's personal preferences and knowledge from the module.
Lesson 11. Knife Hit Game
- Make a new, interesting game Knife Hit
- Create animations
- Working with effects
- Working with physics
- Uploading games for specific devices
Module 3 - Graphic Design and Website creation
In this module, students learn the basic principles of design and web design, such as color, composition, animation, working with fonts and visual content, as well as competent composition of website content. In addition, throughout the course students develop soft skills such as communication, self-presentation and teamwork!
As a result of the course, students will learn:
As a result of the course, students will learn:
- work with raster and vector images,
- create your own logos and learn how to build a composition correctly
- will have the opportunity to develop creative skills and spatial thinking
- work in analogues of Adobe Photoshop and Adobe Illustrator at a basic level
- develop business cards, banners and presentations,
- combine colors and shapes
- create websites on the Tilda platform understand web design
- create a website layout using the Canva editor
- create Zero Block pages and use animated effects
- test your website (usability test)
- conduct SEO optimization
Module Plan
Lesson 1. Collaging in graphic design
- Introduction to the profession of graphic designer. Explore the concept and method of collaging in graphic design. Learn to use basic image editing tools in Photopea. Get to know the terms - Smart Objects, Opacity, Fill and Background Color. Create your own collage in Photopea.
Lesson 2. Creating icons in Inkscape
- Learn Inkscape's tools for creating vector icons. Get acquainted with the basic It terms of the lesson. Develop icons for the brand in Inkscape.
Lesson 3. Creating a comic in Canva
- Let's get acquainted with the concept of storytelling. We study the basic It terms of the lesson. We come up with themes for comics. We draw a comic and use the tools of the Canva program.
Lesson 4. We come up with a calendar of news events for 1 month in the Canva program
- Learn Canva and its core tools. Get acquainted with the basic It terms of the lesson. We come up with topics for news feeds. We carry out preparatory work on the project using the Miro program. We create a calendar of news events for 1 month in the Canva program.
Lesson 5. Creating a logo from simple shapes in Inkscape.
- Get acquainted with the Inkscape program for working with vector images. Learn the basic terms of the lesson. Introduction to branding. Logo concept. Design and design your own logo using the tools in Inkscape.
Lesson 6. Creating a website using the Tilda constructor
- What is a website? What is a web page? What is a Blog?
- Website creation on Tilda
- Creating pages using the builder
- Design Thinking Process
Lesson 7. How to create your own website design Creating a website on Tilda Creating
- Zero Block pages
- Hotkeys
- User Interviewing
Lesson 8. Continued
- Creating a Menu
- Creating Menu Pages
- Publish website pages and add a link to the pages in the menu
- Completing pages, filling content
- Usability test
Lesson 9. Creating a website using the Tilda constructor
- What is an online store?
- Creating an Online Store Using the Tilda Designer
- Project brief
Lesson 10. Creating animated effects on the page
- Rules for using animation
- Designing web animation
- Animated effects
- Website Content
Lesson 12. Project Presentation
- Completing work on the website.
- Feedback form. Project presentation
Lesson 11. Responsive Web Page (Desktop and Mobile Version) and SEO - page optimization for search engines
- Adaptive website. Types of responsive design Examples responsive & not responsive pages Desktop and Mobile Version
- A browser tool that allows you to evaluate website adaptability
- A-B testing developer tools
- SEO - page optimization for search engines Modern SEO promotion. 11 steps to optimize your website
- Site's home page
- How might we?
Module 3. WoofJS
WoofJS is an online environment where students move from blocks (visual programming) to code using the syntax of JavaScript. WoofJS is an online environment in which students learn about WoofJS, the JavaScript programming language base and create projects, starting from simple projects where characters can interact with each other, to full-fledged games. This module is an excellent preparation for the next level of IT Senior training.
Course Objectives:
Course Objectives:
- Transition from block coding to syntax coding
- Learning the basics of JavaScript programming
- learn to write your first scripts
- learn to create games with code
- develop creative skills
- teamwork
- presentation of own projects
Module Plan
Lesson 1. Introduction to the World of Programming
- Overview of programming and game development. Introduction to key concepts: algorithm, program, programmer, and code.
- Familiarisation with the JavaScript programming language.
Lesson 2. Creating the First Game in WoofJS
- Learning about geometric shapes that can be created in WoofJS.
- Exploring colours available in JavaScript. Understanding key terms: score and variable. Developing a basic game.
- Adding winning conditions.
Lesson 3. Building the Star Catcher Game
- Introduction to event-based programming and the concept of timers.
- Learning how to add interactive events that respond to player actions.
- Implementing a scoring system to track game progress.
- Integrating a timer to introduce time-based challenges.
Lesson 4. Developing the Apple Catcher Game
- Working with multiple geometric shapes within a single project.
- Expanding knowledge of movement-related commands, including "Turn Left" and "Turn Right."
- Programming character movement using arrow keys to control left and right motion dynamically.
Lesson 5. Enhancing the Apple Catcher Game
- Implementing a more advanced scoring system using variables to store and update the player's progress. Introducing logical operators to refine game mechanics and decision-making processes.
- Defining loss conditions to create a more structured game flow.
Lesson 6. Developing the Hungry Crab Game
- Introducing game characters.
- Implementing movement controls for the crab using arrow keys.
- Adding a scoring system based on variables. Integrating a countdown timer that decreases every second.
Lesson 7. Developing the Fly Trap Game
- Adding the main character.
- Implementing left and right movement using arrow keys.
- Creating an interactive event where a vertical line grows when the spacebar is held down and shrinks back to its original position when released.
Lesson 8. Enhancing the Fly Trap Game
- Introducing secondary characters to the game. Implementing a scoring system.
- Defining conditions for score changes.
- Adding a losing condition to end the game when certain criteria are met.
- Displaying a "Game Over!" message when the player loses.
Lesson 9. Creating the Obstacle Dodger Game
- Setting up a custom background colour.
- Adding the main character.
- Implementing movement mechanics using keyboard controls.
- Defining the boundaries of the game space to restrict movement.
Lesson 10. Enhancing the Obstacle Dodger Game
- Using an array to store obstacles dynamically. Introducing four new clones every second and storing them in the array.
- Implementing a game-over condition based on collisions.
- Adding a timer that records the longest survival time in the game.
Lesson 11. Developing the Rocket Race Game
- Implementing events for tilting the rocket using arrow keys.
- Creating an array to store stars as collectible objects.
- Introducing a scoring system to track player progress.
Lesson 12. Project Fair
- Expanding the Rocket Race game by incorporating an array of planets.
- Implementing a losing condition to define game over scenarios.
- Preparing final projects and presentations for the Project Fair.
- Presenting completed projects to an audience.
Module 2. Motion Design
Animation is fun not only to watch but also to create! However, where do you start? How is animation done, and what is motion design?
Motion design represents graphics in motion, the "animation" of images. The animated texts and images encountered in games, YouTube videos, cartoons, and movies are the result of the work of a motion designer. Every day, people increasingly prefer the video format over other types of content, which is why we've developed a course that combines multiple skills relevant to Generation Z. This module is intended for creative children who want to learn how to create animations and animate characters. We'll start from the simplest, so that anyone can join in learning motion design.
Motion design represents graphics in motion, the "animation" of images. The animated texts and images encountered in games, YouTube videos, cartoons, and movies are the result of the work of a motion designer. Every day, people increasingly prefer the video format over other types of content, which is why we've developed a course that combines multiple skills relevant to Generation Z. This module is intended for creative children who want to learn how to create animations and animate characters. We'll start from the simplest, so that anyone can join in learning motion design.
Module Plan
Lesson 1
- What is Motion Design?
- Why is it needed and where to start studying it?
- Difference: Animation vs. Motion Graphics
- Who is a Motion Designer?
Lesson 2
- Learn how Minecraft worlds are added
- Create a new animation using a Minecraft world
- Work with camera and lighting
Lesson 3
- Learn how to add the Parent property
- Create a new animation using the Parent property
- Learn how to change the time of day
- Test your knowledge
Lesson 4
- Create a new Archery project
- Use particle effects
- Learn how to create slow-motion animation
- Knowledge check
Lesson 5
- Discovering the new site - Animatron
- Create an animation based on invented stories
- Add animation and come up with a new story
- Save the project
Lesson 6
- Understand 3D vs 2D graphics
- Familiarize yourself with the MagicaVoxel program
- Create 3D Voxel Art with MagicaVoxel
- Work with materials
- Create your first project - Calculator
Lesson 7
- Discuss 3D animation
- Work in the MagicaVoxel program
- Create frames for 3D animation
- Save the project, render
- Work with a video editor
Lesson 8
- Work in the MagicaVoxel program
- Create a character from the SpongeBob cartoon
- Create frames for 3D animation
- Save the project, render
- Work with a GIF editor
Lesson 9
- Work in the MagicaVoxel program
- Create a road for cars
- Create frames for 3D animation Time change
- Save the project, render
- Work with the GIF editor
Lesson 10
- Work in the MagicaVoxel program
- Finish the project from the last lesson
- Create/Add a car
- Create frames for 3D animation
- Save the project, render
Lesson 11
- Test your knowledge
- Quiz - Answer questions and explain
- responses
- Create the final project
- Start working on the presentation
Lesson 12
During the course, students have chosen a theme for their final project. They present the project they worked on in KoduGameLab this time. This project should reflect the preferences and personal knowledge of the student from the course.
How are the lessons structured?
2h lesson per week focused on 80% practice
Small groups of up to 10 kids with individual support from teachers
|
Live online or in-person lessons
What our students will achieve?

Certificate of completion of the course
Upon completion of the training, you will receive a certificate from Impact School in your national language and English.
Their own portfolio of projects
Their coding dreams are coming true! Hear how our classes helped these two students!


Your child will create their first project after the trial lesson, and you'll be convinced of the quality of our teaching.
Sign Up for a Free Trial
By proceeding, you agree to our Terms & Conditions and our Privacy Policy. You agree to receive marketing communications and program details from Impact A&C on Email, Text & Whatssap.
Online subscription
MONTHLY SUBSCRIPTION
IT MASTER ONLINE
119
€
Every Wednesday | 3:30 PM – 5:30 PM
One of our most popular courses, built to keep our students engaged and challenged - by mastering programming, building websites, crafting games, exploring AI and machine learning.
One of our most popular courses, built to keep our students engaged and challenged - by mastering programming, building websites, crafting games, exploring AI and machine learning.
Want proof our coding classes are awesome? Hear what parents are saying!


Parent, Sana
I checked with Aariz and he told me he really likes doing the coding classes and quite happy with the teaching method. I'm also happy to get the feedback on him.
Parent, Erdal
Hi Daniela, I'm very well and hope you're too. Firstly, Ali Denis really loves coding and your lessons/school. We want him to keep come to lessons.
I initially bought it for my son for one month, and he loved it so much that I ended up getting eight more months. It's incredible beneficial, my son loves it a lot, and how he wants to go every day. I highly recommend it.
Parent, Cara
5.0
5.0
5.0
5.0
Highly recommend 🙌 My boys enjoying so much the coding lessons!❤️
Parent, Ioana
Sneak Peek of Our Future-Shaping Classes
Frequently Asked Questions (FAQ)
Our coding courses are designed such that any learner with no previous coding knowledge can easily follow along. Our courses are specifically tailored for different age groups and different levels of coding knowledge, which will be perfectly suitable for kids with no previous coding experience, some experience or more advanced knowledge in coding.
Children can begin learning coding languages as early as 5 years old. The sooner the better - our coding courses are focused on practical activities, where the aim is for the kids to develop the key technical skills to further excel in this industry.
For in-person classes, your child will be provided with all the technology required, so no need to bring anything. For online classes, your child only needs a laptop/computer equipped with a working webcam and a stable internet connection.
Impact A&C is an international tech education organisation, founded 7 years ago, and currently has over 60 branches across Europe and more than 20,000 graduates. We are trusted partners of a number of prestigious schools with whom we work, trusted and recommended by 98% of parents. We partner with large organisations like Amazon to continually improve our coding courses and ensure they cover the latest tech developments.
Yes, we do offer great flexibility with our learning schedule. We have multiple options for in-person and online live classes - weekdays or weekends, multiple time slots. We will always strive to meet parents’ and kids’ personal needs and offer the options of switching groups, days or timings.
GREAT NEWS - we are registered with OFSTED on their voluntary register for our branch in Stratford, at Sarah Bonnell School. You now have the option to use childcare vouchers towards our Impact tech educational courses. Get in touch with us via the phone numbers listed on our website, or submit a form and one of our Impact consultants will help you out.
Each coding course, specifically designed for different age groups, is 9 months long covering 3 different modules. The course if perfectly aligned to the school academic year. During each term, your child will learn a new module (12 lessons) finishing with a project fair, where we invite parents in and kids are presenting their final project and what they learned during each module. Our online live classes, as well as the in-person classes are 2h long. We find the 2h is the optimal time for the kids to apply the theory in practice and work on building their own tech project. This way, they develop the necessary skill set, better understand the theory and get more creative when developing their projects (i.e. creating their own game, animation, website, app etc.)
We offer options to join our coding courses on weekdays afternoon or weekends (with options between 9:30-19:00).
We offer options to join our coding courses on weekdays afternoon or weekends (with options between 9:30-19:00).
We take pride in delivering courses that are both academic and most importantly, fun. No matter which class, your child will come away having learnt a lot, but not through ‘rote’. We have top quality tutors who are great at engaging children and inspiring them. This is not about ‘playing games’ all day.
Coding has been called "the literacy of the 21st century” for good reason. Just like math, science, and literature, coding is a key aspect of understanding our technologically advanced world. There’s a huge need for a generation that not only understands technology, but how it works. Regardless of whether your kids one day pursue a career in coding, Impact A&C teaches them confidence, logic, resourcefulness, and problem solving skills that will serve them for the rest of their lives in any industry where they will need to apply their knowledge in technology.
It’s great that schools offer computer education, but they are often under-resourced and are unable to offer the sophisticated ongoing coding curriculum that kids need. Parents who want their kids to get ahead and learn coding properly are turning to Impact A&C. We offer advanced project-led activities, where kids will learn coding and develop their own game, graphic design project, website, app, animation etc.
Impact Centers are open to kids after school on weekdays or weekends. Please call or submit a form on our website and one of our consultants will give you all the details.
Absolutely! We encourage parents to watch their kids from outside the classroom to see how they perform during the class, and at the end of each lesson we welcome the parents in to see their kids’ projects, as they are eager to proudly show what they have created during the lesson.
At Impact A&C locations, your child's safety is our highest priority. We always conduct our classes on school premises and ensure that all procedures and policies are being followed to maintain a secure space for your kids. All our teachers are fully trained, DBS checked and have the necessary experience to work with kids.
We have multiple groups, and we keep them small—generally 8 to 10 children per group. For larger groups (up to 15 children), we have both a teacher and an assistant in the classroom to ensure that every child receives individual attention and support.
1 session a week. 120 minutes (2 hours) per session.
Your child will create their first project after the trial lesson, and you'll be convinced of the quality of our teaching.
Sign Up
By proceeding, you agree to our Terms & Conditions and our Privacy Policy. You agree to receive marketing communications and program details from Impact A&C on Email, Text & Whatssap.
Get a Free Trial
Discover the World of Coding with Us!
By proceeding, you agree to our Terms & Conditions and our Privacy Policy. You agree to receive marketing communications and program details from Impact A&C on Email, Text & Whatssap.