




2
hours
lesson per week

Live
classes with a teacher

8-10
kids per group
7th Oct
starting
Your child will learn in the most advanced, interactive way
1
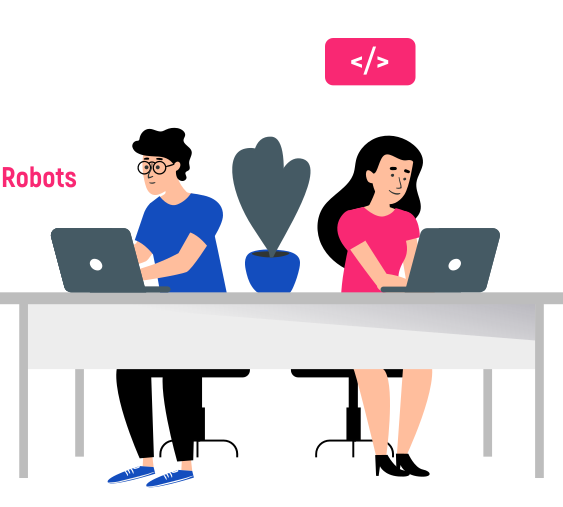
They will learn how different devices work.

2
They will learn how to build and control Robots.
3
They will learn creating computer games.

Why Parents Choose impact A&C
Our mission is to transform every child from a mere consumer into a creator of IT technologies. Instead of mindlessly using gadgets without benefit, your child will gain skills that can be applied in school, in their chosen profession, or to become a sought-after IT specialist.
Courses that will put your child at the forefront of technology
8 years of international experience across Europe, teaching 86 tech topics
Certified Specialists in delivering engaging & interactive learning sessions with kids
Trusted by parents and partners
IT-Senior - level l course program
- 12 practical lessons
- 12 practical lessons
- 12 practical lessons
IT-Senior - level ll course program
- 12 practical lessons
- 12 practical lessons
- 12 practical lessons
Lesson 12
Module 3. Games on Python.
The programming language Python is extensively used worldwide. Development is fast and easy, which makes it the preferred language for many programmers, including Yandex and Google developers. Python is used in web programming, computer security, graphics, machine learning, and more. Python specialists are currently in demand across various IT fields.
As a result of the training, students will:
As a result of the training, students will:
- Master the basics of the Python language
- Learn to create drawings and animations using code
- Develop their own games
- Present their projects
Module Plan
Lesson 1
- Registration on the Codesters platform;
- Studying the interface of this platform;
- Gaining theoretical knowledge about the use of Python in video games;
- Creation of the first game.
Lesson 2
- Creating the game "RUN" in the Python language.
- Working with new functions and code instructions.
- Creating two characters with different controls.
- Managing scene positions.
Lesson 3
- Creating the game "Whack-A-Mole" in the Python programming language.
- Working with lists.
- Understanding the concept of loops and its practical application.
Lesson 4
- Creating a first-person shooter (FPS) game.
- Working with the mouse_move() function.
- Spawning enemies at random locations.
Lesson 5
- Creating a remastered version of the legendary game "Asteroids."
- Working with the functions turn_left() and turn_right().
- Implementing teleportation from one part of the scene to another.
- Adding a spaceship sprite and a laser installation.
Lesson 6
- Creating the platformer "Space Rush."
- Implementing shooting from weapons.
- Displaying data on the screen using an alternative method.
- Implementing enemy spawning and their attacks.
Lesson 7
- Cration of the platformer “Space Rush”;
- Implementation of weapon shooting;
- Implementation of spawning of opponents and their attacks;
- Displaying data on the screen in an alternative way.
Lesson 8
- Creation of a project in the Beat'em Up genre “Street fight”;
- Implementation of the principle of animation in games;
- Creating a series of strikes;
- Exploring the possibility of moving around the level.
Lesson 9
- Creating the game "Basketball Challenge."
- Implementation of the cyclic movement of the hoop.
- Implementation of shooting the ball.
- Implementation of the ball going through the hoop.
Lesson 10
- Creation of the game “Cannon Destroy”;
- Implementation of work with gravity;
- Implementation of work with sound.
Lesson 11
- Creation of the game “Hangman”;
- Intensive work with cycles;
- Intensive work with lists;
- Learning a new try, except block;
- Prepare for the presentation;
- Protect the project;
- Summarize the knowledge acquired during the course.
Module 3. Design and Branding.
This course is a journey through the fundamentals of design and branding, incorporating lessons on using tools like Figma, Miro, and Canva. It covers a wide range of topics from the basics of color theory and logo design to the nuances of branding through text and social media. Students will learn about the importance of creating accessible, culturally sensitive, and eco-friendly designs that make a positive social impact.
After completing the module, students will know how to:
After completing the module, students will know how to:
- Create their own brands and their identities
- Work with tools like Figma, Miro, and Canva at an advanced level
- Develop models for printed products
- Create a brand book for their own brand
Module Plan
Lesson 1
- Learn about the components that make up a brand's identity.
- Gain skills in using the Miro.
- Develop and refine an idea for creating a personal company.
- Identify and understand the target audience for the company.
Lesson 2
- Understand the color wheel and its significance in design.
- Learn the rules for matching colors effectively.
- Discover how to create a brand-specific color palette.
- Practice designing with the brand's chosen colors.
Lesson 3
- Grasp the concept and importance of a logo.
- Learn the guidelines for creating a memorable logo.
- Become acquainted with programs for searching design references.
- Create a moodboard for logo ideas and sketch logo concepts.
Lesson 4
- Learn the difference between vector and raster graphics.
- Get familiar with using Figma for design projects.
- Apply fundamental design principles in project creation.
- Design a logo using Figma, incorporating learned techniques.
- Prepare for the presentation.
- Present the portofolio.
- Summarize the knowledge gained in the course.
Lesson 5
- Utilization of Figma for illustration purposes.
- Creation of basic shapes relevant to brand identity.
- Development of patterns reflecting the brand's character.
- Illustration of elements embodying the company's identity.
Lesson 6
- Exploration of brand identity through text.
- Definition of company mission and creation of taglines.
- Study of design integration principles.
- Poster creation featuring taglines.
Lesson 7
- Examination of brand identity's importance in social media marketing.
- Identification of key elements of brand identity on social media.
- Analysis of successful social media brand strategies.
- Production of visual content aligned with brand identity.
Lesson 8
- Examination of the significance of mascots for brands.
- Design of a mascot or symbol fitting the brand and appealing to its audience.
- Design of a cohesive set of stickers reflecting the brand’s identity.
Lesson 9
- Learn about the importance of honesty in design.
- Understand how to make designs accessible.
- Discover how to respect cultural differences.
- Explore eco-friendly design options.
Lesson 10
- Recognize the importance of originality in design work.
- Understand the implications of plagiarism in graphic design.
- Explore the role of AI in creating and influencing design.
Lesson 11
- Understand the components of a brand identity portfolio.
- Learn how to tailor a portfolio to showcase a specific brand’s identity.
- Develop storytelling techniques to enhance portfolio presentations.
Lesson 12
Module 3. Web Factory (Tilda HTML CSS).
A good website is the image of a brand, whether it's a company or a personal brand. In this course, students will gain practical skills in writing website code and creating a website without programming. They will develop systemic thinking skills and become familiar with tools for website creation, offering complete freedom to implement a variety of ideas. They will solve various problems using HTML and CSS code. They will create their own website with a graphical interface. Additionally, by the end of the course, students will present their final projects to the group.
Module Plan
Lesson 1. Getting to know Tilda
- Creating a site on Tilda Developing
- Page structure
- Basic design rules
- Working with images
- Web Design
Lesson 2. Advanced Website Design
- Taste in design
- Working with text
- Working with blocks
Lesson 3. Multi-page site
- Site types
- Creating the page
- Site menu
Lesson 4. Zero-Block
- Zero-block
- Animation
- Responsive site
Lesson 5. Knowledge of HTML
- What is HTML and CSS
- Page Structure
- HTML tags
Lesson 6. Working with links, images and texts
- HYPERLINK
- Image
- List
- Menu
Lesson 7. Working with tables and website layout
- Tables
- The layout of the site
Lesson 8. Introduction to CSS
- Connection with CSS
- Tags and Attributes
Lesson 9. Block layout
- Sitemap
- Multi-level menu
Lesson 10. HTML5 multimedia. Drawing with CSS3. HTML forms
- Media in CSS
- Adding a form
Lesson 12. Project Fair
The students chose the project topic during the course. They will present a project that was made in HTML and CSS. This project should reflect the student's personal preferences and knowledge of the course.
Lesson 11. Own website
- Own site
- In this tutorial, we will repeat the steps and create our own website using HTML and CSS. Students will create their own website.
Module 1. Kodular
In this course, the students will learn how to create applications on Android, and they will get skills of developing UI/UX solutions on the Thunkable platform. We will go through the entire development process from UI design and code writing to release in the Google Play.
As a result of the training, students:
As a result of the training, students:
- explore the features and capabilities of the Kodable platform
- develop applications on various topics
- develop logical and creative thinking
- will learn teamwork skills
- present their own projects and test them on smartphones
- Soft skills: become financially literate
Module Plan
Lesson 1. Introduction to the Kodular Environment. Creating a Logic Game
- Introduction to the world of programming and app development
- Learning key terms: algorithm, program, programmer, code
- Understanding the difference between a good quality app and a poorly designed one
- Prototyping the first app
- Discussion of final project ideas
Lesson 2. Creating a Timer App
- Creating a timer app and adding a stopwatch Creating multiple screens and programming navigation between them
- Learning how to add custom images and sounds Key terms: global variable, navigation
Lesson 3. Randomizer App
- Develop more confident use of basic programming concepts
- Create two apps: a randomizer and a magic ball that can generate random answers
- Introduction to the random component
- Development of flexible problem-solving skills
Lesson 4. Smart App
- Introduction to new components
- Creating an app with speech recognition functionality
- Personalizing the created app
- Designing a unique, individual layout
- Module Plan
Lesson 5. Creating a Quiz Game
- Developing an app in the category of quizzes or surveys, using a list of questions, answers, and corresponding images
- Learning the terms: global variable, list, index
- Using the concept of index to check the correctness of an answer
- Using conditional statements if – else
- Creating an app with two or more screens
Lesson 6. Chat Application
- Introduction to cloud databases
- Creating a chat app with the ability for friends to communicate
- Designing a registration screen
Lesson 7. Creating a Schedule Application Review of previously learned material
- Building a more complex application where users can input data
- Practice working with lists, indices, and variables
- Introduction to the concept of iteration in programming
- By the end of the lesson, students will have an app where they can create their own schedules
Lesson 8. Space Shooter Game
- Creating the Space Shooter game from scratch (interface and app logic)
- Using the random function to make the enemy move in a random pattern
- Working with components: ImageSprite, Canvas, Ball, Clock, Button, Label
- Personalizing the created application
- Module Plan
Lesson 9. Delivery App
- Creating a food delivery app where users can input data
- Practicing working with lists, indices, and variables
- Introduction to the Share and Message components
Lesson 10. Tic-Tac-Toe Game
- Creating the classic Tic-Tac-Toe game (interface and application logic)
- Working with Button, Label, and LongClick components
- Personalizing the created application
Lesson 12. Project Presentations
- Presentation of one project in front of the audience
- Students explain how their project works and its purpose
- They describe which blocks they used and how they function
- After all presentations, an anonymous voting session will be held to identify the best student presentations
Lesson 11. Tourist App
- Introduction to a new interface
- Creating an app for tourists
- Working with maps and coordinates
- Preparing for project presentations
Module 2. Game Development with Unity
This direction will provide the opportunity to feel the creator of your own game world. Students will learn to develop 2D and 3D games on the Unity engine, advanced and complex tools that create full-fledged commercial projects. They will also study the creation of virtual reality games, with the use of special VR screens.
- Working on the Unity platform
- Create different types of games on this platform
- Creating VR games
- Work on the plot, mechanics and characters of the game
- Soft skills: to work with information, manage attention and understand your task in collective work
Module Plan
Lesson 1. Introduction to the Kodular Environment. Creating a Logic Game
- Brief history of Unity, its development, and its application in popular games.
- Creating an account on the Unity platform. Setting up a new 3D project and explaining the interface.
- Creating 3D objects and materials for them. Importing assets from the Unity Asset Store. Adding the main character to the game.
- Using and managing assets within the game.
Lesson 2. Creating the Game Environment
- Creating 3D objects for the game’s main scene. Defining character physics properties (mass, gravity).
- Understanding parent and child objects and interactions.
- Creating obstacles using various objects and materials.
Lesson 3. Interface and Scripting for the Game
- Introduction to the User Interface (UI) and customising it.
- Adding text for displaying scores.
- Writing the first script in C# to define character actions.
- Introduction to Visual Studio and programming character movement.
- Testing and exporting the project.
Lesson 4. Creating a 2D Game
- Setting up the workspace for a 2D scene.
- Introducing 2D objects and their properties. Adding lighting and setting up scene backgrounds. Managing character movement within a 2D platformer. Adding scripts for game actions and character responses.
Lesson 5. Developing a Racing Game
- Setting up the scene for a racing game.
- Adding 3D objects for the track and customising controls.
- Setting up player controls and adjusting the environment.
- Designing the game's visual style.
Lesson 6. Creating a 3D Game - Introduction to Terrain
- Exploring Unity’s Terrain tool.
- Creating landscapes and adding 3D objects. Customising the visual design of the game’s environment.
Lesson 7. Memory Game - Part 1
- Creating objects to develop memory skills. Adding sprites to the scene.
- Setting up the game’s visual layout.
Lesson 8. Memory Game - Part 2
- Adding code for testing memory and programming game actions.
- Adding scoring text to the screen.
- Attaching code to game objects.
Lesson 9. Creating a game in the Style of Doodle Jump
- Setting up the main scene.
- Adding required sprites to the project.
- Positioning and arranging sprites within the scene. Adding jump mechanics and camera movement scripts.
Lesson 10. Extending the Doodle Jump Game
- Enhancing the interface.
- Adding text to display on the screen.
- Coding the game's object generation.
- Adding a FixedUpdate function for game object spawning.
- Attaching scoring scripts to objects.
Lesson 12. Project Presentations
- Students present one project to an audience. Explain the purpose, functionality, and objective of the project.
- Describe the blocks used and explain how they work.
Lesson 11. Project Preparation
- Developing original projects based on individual ideas.
- Reviewing course material to reinforce knowledge.
Module 1. Graphic Design and Animation
Graphic design is the art of visual communication that combines images, words and ideas to convey information to the audience.
Animation is a way of manipulating objects to make them look like moving images.
Learning animation and graphic design combined, will provide the student with a great opportunity to develop as a designer or animator.
As a result of the training, students:
Animation is a way of manipulating objects to make them look like moving images.
Learning animation and graphic design combined, will provide the student with a great opportunity to develop as a designer or animator.
As a result of the training, students:
- Learn the basics of graphic design, such as composition, color, color palette
- develop raster and vector animation
- Understand how to create 2D and 3D animations
- can model in 3D
- will create more than 5 animations in different styles
- Soft Skills: public presentation, presentation of own projects
Module Plan
Lesson 1. Introduction to the Pencil 2D environment
Students will get acquainted with the world of graphic design and animation, learn and discuss the differences between them. They will create and animate their first character. They will understand that graphic design is the art or profession of visual communication, while animation is a method by which figures perform movements and look like moving images.
Lesson 2. First vector animation
Students will understand what vector and raster represent, learn that a scene is a separate event or conversation between characters that takes place in a certain period of time and in a certain place. They will create a color palette for subsequent use in animation.
Lesson 3. Pixel art style animation
Students will continue to get acquainted with the world of graphic design and animation, discuss different types of animation, clarify existing composition rules and where they are applied. They will start working in the PixilArt editor, where they will create animated pixel graphics.
Lesson 4. The world of 3D modeling
Students will get acquainted with the world of 3D modeling, discuss the differences between 2D and 3D. They will begin work in Spine Design, examine the tools in the interface, and create a character resembling a Minecraft hero.
Lesson 5. Robot Eva from the Wall-e cartoon
Students will get acquainted with Color Asset and discuss where it can be used. They will examine the basics of working with Lathe forms and the Fresnel effect, learn to rename layers. The result of the lesson will be the Eva robot from the Wall-e cartoon.
Lesson 6. Scenic Design Project
Students will get acquainted with Extrusion, discuss what Scene Design (scenic design) is. They will learn to work with Group and Fresnel and understand how to use Scale. As a result of the lesson, students will develop a scenic design project.
Lesson 7. 3D Animation
Students will continue working with 3D animation and learn what a scenario is. They will get familiar with and learn how to use States and Events. They will learn how to animate objects within a scene.
Lesson 8. Modeling Mode
Students will study modeling modes. They will get acquainted with and learn how to use Smooth & Edit, Subdivision Modifier, and Library. They will create a palm tree model.
Lesson 9. 2D Animation in Animaker
Students will get acquainted with the Animaker service and figure out how to best create a character depending on the scenario. They will get familiar with and understand how to use Actions and Expressions. They will develop a 2D animation using Animaker.
Lesson 10. Commercial Video
Students will learn to work with layers, discuss how long a commercial video should last, and why more scenes are needed. They will get acquainted with and learn how to use Smart movements. They will create their own commercial video.
Lesson 12. Project Presentation
Students will present their projects to an audience. They will explain how the project works, its purpose, and which services and programs were used during the work process. Based on voting results, the best
presentations will be identified.
presentations will be identified.
Lesson 11. Personal Project
Students, while working on their final project, will summarize the knowledge gained during the course
Module 2. 3D modeling Tinkercad
3D-modelling is one of the most popular directions of IT-sphere. The three-dimensional modelling method is widely used in the game industry, film and animation, robotics, architecture, design and construction, medicine and industry.
In class child:
In class child:
- Learn the basics of 3D-modelling
- Understand the principles of creating 3D graphics
- Learn how to work in one of the most popular free 3D-editors Tinkercad
- Will acquire useful technical and engineering skills
- Develop spatial thinking, imagination and creativity
- Create his own design of physical objects: space parts, transport, homes, living beings
- Final draft presented
Module Plan
Lesson 1. Introduction to the Tinkercad Platform
- Introduction to the world of 3D modelling. Exploring visual design using the Tinkercad platform.
- Learning key terms: algorithm, project, designer. Understanding basic blocks, working with shapes, positioning, and creating the first model.
Lesson 2. Creating the First Model
- Introducing the concepts of construction, merging, and optimisation.
- Learning how to work properly with personal accounts.
- Understanding how to manipulate different details using shortcut keys.
- Designing a personal project that will be used in future lessons.
Lesson 3. Developing Spatial Thinking
- Gaining confidence in fundamental modelling techniques: duplication, combination, reuse, and alignment.
- Exploring adventure-style model creation and developing original narratives.
- Working with objects of varying complexity, learning about basic blocks and custom block creation.
Lesson 4. Introduction to Model Development
- Learning to create essential components through block combination.
- Understanding grouping functions for efficient design.
- Studying the concept of "object positioning.
- 3D Modeling in Tinkercad
Lesson 5. Creating a Spider Model
- Introduction to Connector blocks.
- Working with Assembly and Component blocks. Learning key terms: ruler, positioning.
- Designing a Tarantula spider model.
Lesson 6. Modelling Mountain Terrain
- Understanding terrain and elevation.
- Exploring various types of landscapes.
- Designing a location model (in this case, mountains).
- Working with ground components.
- Knowledge assessment in the form of a competition.
Lesson 7. Sea Monster Project
- Revisiting previously learned concepts: grouping, duplication, positioning, and customisation. Continuing model development.
- Using multiple block groups simultaneously. Adjusting character parameters and appearance. Implementing different types of optimisation techniques to improve performance and efficiency
Lesson 8. Creating a Turkey Model
- Exploring design principles.
- Working with parameters and basic mathematical calculations.
- Designing a custom house model based on a given example.
- Creating a fully enclosed space within the design. Studying structural concepts such as load-bearing elements, support, and stability.
- 3D Modeling in Tinkercad
Lesson 9. Creating the Tesla Tower Complex
- Designing a modern architectural complex. Practicing positioning and optimisation techniques.
- Using multiple blocks and details to build a complex structure.
- Encouraging creativity in developing a unique project.
Lesson 10. Roman Warrior
- Creating a 3D model of a Roman soldier.
- Practicing positioning and optimisation for detailed modelling.
- Using a variety of blocks and components to refine the model.
- Applying creative thinking to design a custom emblem or shield.
Lesson 12. Project Fair
- Independent work on a self-designed project. Applying all acquired skills to create a fully developed model.
- Assessing the quality of knowledge retention and application.
- Presenting final projects and discussing design choices.
Lesson 11. Project Design
- Hands-on practice in creating essential structural elements through block combination.
- Enhancing skills in grouping and duplication functions.
- Reinforcing previously learned terminology and techniques.
How are the lessons structured?
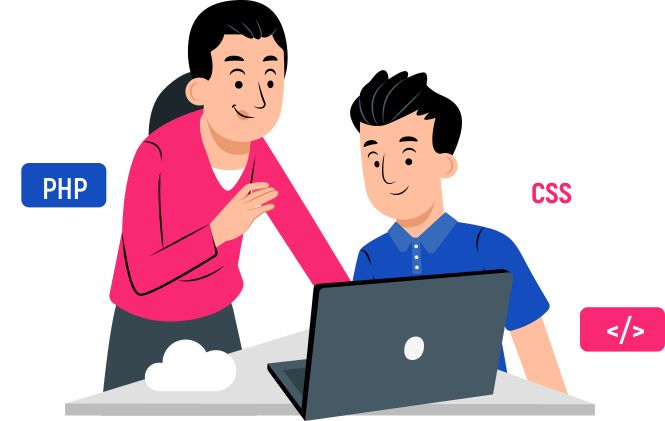
2h lesson per week focused on 80% practice
Small groups of up to 10 kids with individual support from teachers
|
Live online or in-person lessons
What our students will achieve?

Certificate of completion of the course
Upon completion of the training, you will receive a certificate from Impact School in your national language and English.
Their own portfolio of projects
Their coding dreams are coming true! Hear how our classes helped these two students!


Your child will create their first project after the trial lesson, and you'll be convinced of the quality of our teaching.
Sign Up
By proceeding, you agree to our Terms & Conditions and our Privacy Policy. You agree to receive marketing communications and program details from Impact A&C on Email, Text & Whatssap.
Online subscription
MONTHLY SUBSCRIPTION
IT SENIOR ONLINE
119
€
Every Wednesday | 6:00 PM- 8:00PM
Unlock your teen's tech potential with this advanced course! From building games in Python to crafting websites, apps, and AI-powered chatbots, and mastering graphic design and creativity.
Unlock your teen's tech potential with this advanced course! From building games in Python to crafting websites, apps, and AI-powered chatbots, and mastering graphic design and creativity.
Want proof our coding classes are awesome? Hear what parents are saying!


Parent, Sana
I checked with Aariz and he told me he really likes doing the coding classes and quite happy with the teaching method. I'm also happy to get the feedback on him.
Parent, Erdal
Hi Daniela, I'm very well and hope you're too. Firstly, Ali Denis really loves coding and your lessons/school. We want him to keep come to lessons.
I initially bought it for my son for one month, and he loved it so much that I ended up getting eight more months. It's incredible beneficial, my son loves it a lot, and how he wants to go every day. I highly recommend it.
Parent, Cara
5.0
5.0
5.0
5.0
Highly recommend 🙌 My boys enjoying so much the coding lessons!❤️
Parent, Ioana
Sneak Peek of Our Future-Shaping Classes
Frequently Asked Questions (FAQ)
Our coding courses are designed such that any learner with no previous coding knowledge can easily follow along. Our courses are specifically tailored for different age groups and different levels of coding knowledge, which will be perfectly suitable for kids with no previous coding experience, some experience or more advanced knowledge in coding.
Children can begin learning coding languages as early as 5 years old. The sooner the better - our coding courses are focused on practical activities, where the aim is for the kids to develop the key technical skills to further excel in this industry.
For in-person classes, your child will be provided with all the technology required, so no need to bring anything. For online classes, your child only needs a laptop/computer equipped with a working webcam and a stable internet connection.
Impact A&C is an international tech education organisation, founded 7 years ago, and currently has over 60 branches across Europe and more than 20,000 graduates. We are trusted partners of a number of prestigious schools with whom we work, trusted and recommended by 98% of parents. We partner with large organisations like Amazon to continually improve our coding courses and ensure they cover the latest tech developments.
Yes, we do offer great flexibility with our learning schedule. We have multiple options for in-person and online live classes - weekdays or weekends, multiple time slots. We will always strive to meet parents’ and kids’ personal needs and offer the options of switching groups, days or timings.
GREAT NEWS - we are registered with OFSTED on their voluntary register for our branch in Stratford, at Sarah Bonnell School. You now have the option to use childcare vouchers towards our Impact tech educational courses. Get in touch with us via the phone numbers listed on our website, or submit a form and one of our Impact consultants will help you out.
Each coding course, specifically designed for different age groups, is 9 months long covering 3 different modules. The course if perfectly aligned to the school academic year. During each term, your child will learn a new module (12 lessons) finishing with a project fair, where we invite parents in and kids are presenting their final project and what they learned during each module. Our online live classes, as well as the in-person classes are 2h long. We find the 2h is the optimal time for the kids to apply the theory in practice and work on building their own tech project. This way, they develop the necessary skill set, better understand the theory and get more creative when developing their projects (i.e. creating their own game, animation, website, app etc.)
We offer options to join our coding courses on weekdays afternoon or weekends (with options between 9:30-19:00).
We offer options to join our coding courses on weekdays afternoon or weekends (with options between 9:30-19:00).
We take pride in delivering courses that are both academic and most importantly, fun. No matter which class, your child will come away having learnt a lot, but not through ‘rote’. We have top quality tutors who are great at engaging children and inspiring them. This is not about ‘playing games’ all day.
Coding has been called "the literacy of the 21st century” for good reason. Just like math, science, and literature, coding is a key aspect of understanding our technologically advanced world. There’s a huge need for a generation that not only understands technology, but how it works. Regardless of whether your kids one day pursue a career in coding, Impact A&C teaches them confidence, logic, resourcefulness, and problem solving skills that will serve them for the rest of their lives in any industry where they will need to apply their knowledge in technology.
It’s great that schools offer computer education, but they are often under-resourced and are unable to offer the sophisticated ongoing coding curriculum that kids need. Parents who want their kids to get ahead and learn coding properly are turning to Impact A&C. We offer advanced project-led activities, where kids will learn coding and develop their own game, graphic design project, website, app, animation etc.
Impact Centers are open to kids after school on weekdays or weekends. Please call or submit a form on our website and one of our consultants will give you all the details.
Absolutely! We encourage parents to watch their kids from outside the classroom to see how they perform during the class, and at the end of each lesson we welcome the parents in to see their kids’ projects, as they are eager to proudly show what they have created during the lesson.
At Impact A&C locations, your child's safety is our highest priority. We always conduct our classes on school premises and ensure that all procedures and policies are being followed to maintain a secure space for your kids. All our teachers are fully trained, DBS checked and have the necessary experience to work with kids.
We have multiple groups, and we keep them small—generally 8 to 10 children per group. For larger groups (up to 15 children), we have both a teacher and an assistant in the classroom to ensure that every child receives individual attention and support.
1 session a week. 120 minutes (2 hours) per session.


Have any questions? Leave your contact details, and our manager will get in touch with you as soon as possible.
Get a Free Consultation


By proceeding, you agree to our Terms & Conditions and our Privacy Policy. You agree to receive marketing communications and program details from Impact A&C on Email, Text & Whatssap.
Get a Free Consultation
Discover the World of Coding with Us!
By proceeding, you agree to our Terms & Conditions and our Privacy Policy. You agree to receive marketing communications and program details from Impact A&C on Email, Text & Whatssap.